
DIY Truck Storage: Part 2
Step 4: Build drawers – See Figure-3a and Figure-3b
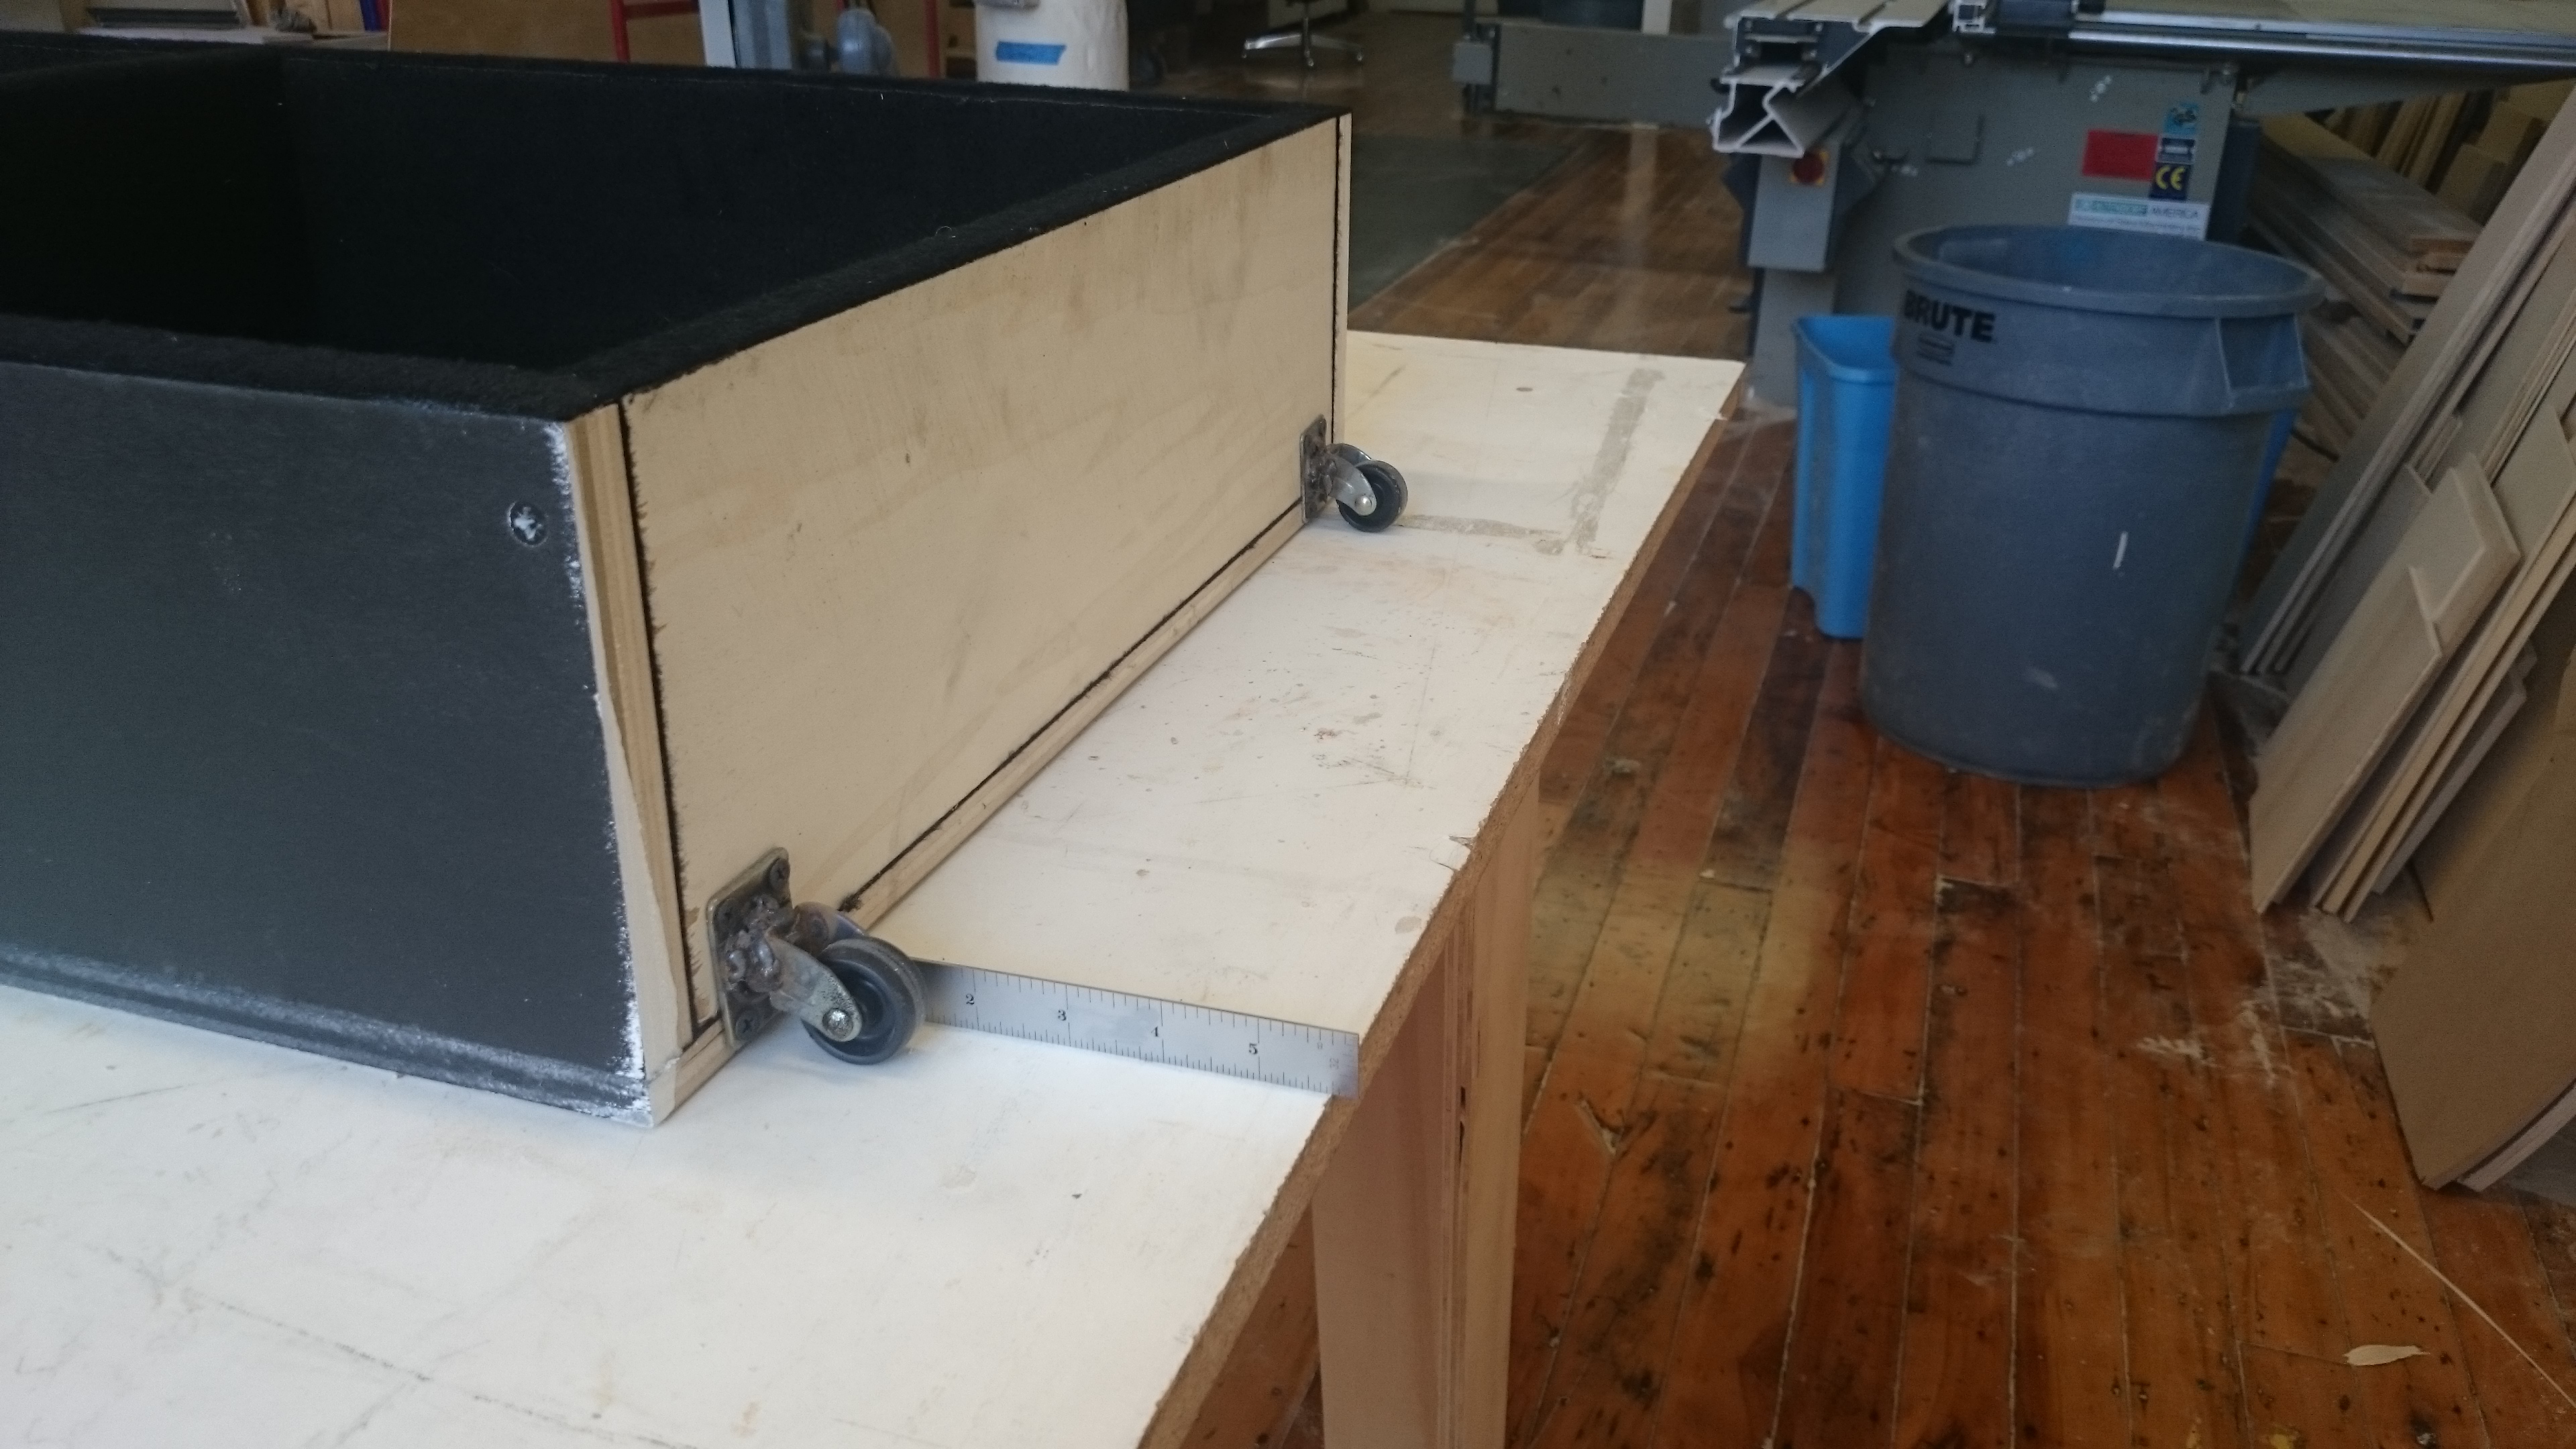
Figure 3a: Remember to leave room behind the drawer for casters.
The size of the opening you made in step 1 determines the final size of the drawers that fit in the boxes. In this case, the opening is 22 ⅜” wide, 7 ⅛” high, and 60” long. The dimensions of the drawer that fits inside are 21 ⅞” wide by 6 ⅝” high by 58” long. The drawer is a full 2” shorter than the opening to leave room for the 1 ¾” casters that get screwed to the back as drawer rollers. If you elect to use drawer slides instead, follow the manufacturer’s instructions for drawer size. Long, heavy duty drawer slides made by Accuride are available online for $290-$600, depending on length.
Cut the bottom and sides of the drawers first and carpet them. I used speaker box cloth. Contact cement available at most hardware stores works well for this. Rough cut the carpet a little big, glue it on per the instructions, and then trim it flush with a sharp razor blade. Next, screw the sides to the bottom and measure between the carpeted sides to determine the width of the front and back. Screw the front and back to the sides. Carpet and install the rest of the dividers according to your design. Fasten the casters to the back of the drawers so that they hang past the bottom about a ⅛”. Now is also a good time to install guide blocks in the drawer openings so that the fit isn’t too sloppy.
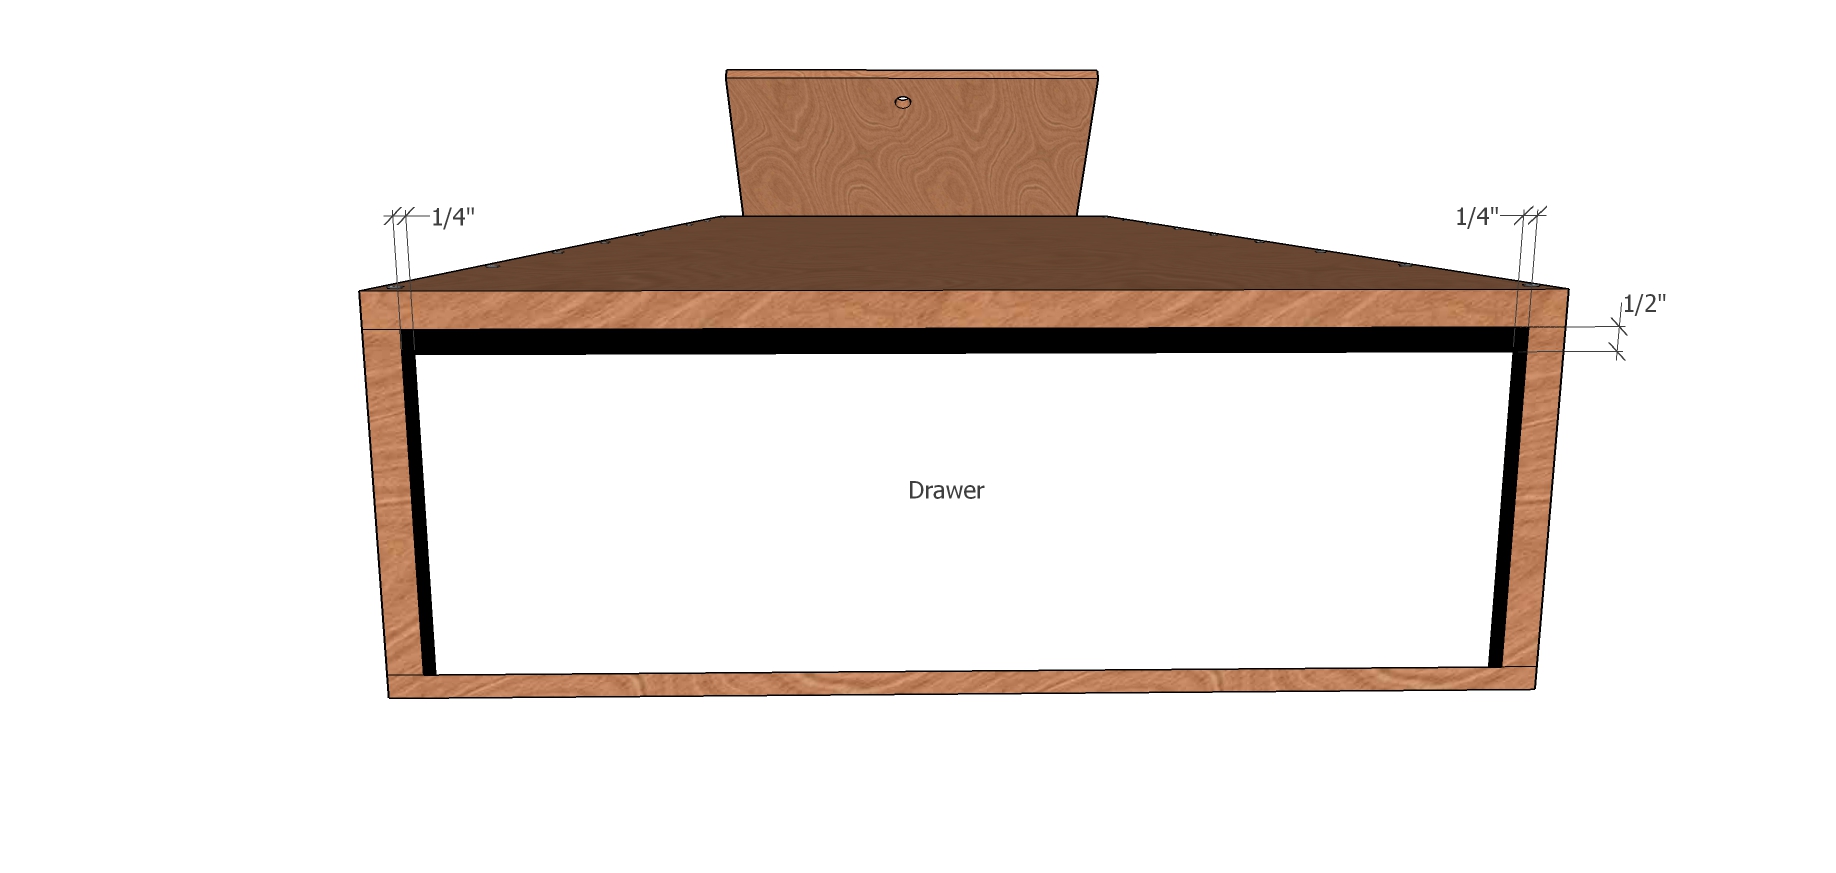
Figure 3b: Drawer in drawer box.
My upland guns are 45 ½” long, and I have a pump action that is 48”. None are wider than 2” or higher than 4 ½”. The slots for my guns measure 2 ½” wide, 6 ⅛” deep, and 48 ¼” long. If I rebuilt this drawer, I would lower the dividers to 4 ½” as it is slightly awkward getting the guns out. During deer season, my friend often brings a scoped rifle that lies on its side in the wider slot, since there’s not enough height for it to stand upright.
When designing your drawers, consult your state’s legal requirements and consider if you want to transport guns cased, trigger locked, or scoped and plan accordingly. Do you need to carry two-piece fly rods as well? If you plan on installing a lock on the drawers, avoid putting any dividers in the center few inches, where they will likely interfere with the locking mechanism. Consider which dividers you’d like to be removable, and make sure you can get to those screws in the future.
Step 5: Make and attach drawer fronts.

Drawer front ready to be secured with screws from the back side.
I prefer solid wood drawer fronts to plywood because the edge grain finishes better; ¾” pine or poplar are economical and readily available choices, but if you envision a more exotic wood and a clear finish, let your inner design star shine.
The drawer fronts for this design are 23 ⅝” wide by 7 ⅞” high. They overlay the drawer opening ½” on the top, ¼” on the bottom, and ⅝” on the sides. This leaves a nice ¼” reveal between the two drawer fronts when installed. Cutting the drawer front the right size is relatively easy, but installing it in the right position on the drawer box can be a little tricky. If you are good at math, you can figure out where the drawer front should meet the drawer box, draw some lines, and screw it on from the backside, using 1¼” screws so they won’t poke through the face. Other methods include using a little hot glue or contact cement to hold the drawer front in place temporarily while you pull the drawer out enough to get some screws through the backside. Be careful not to use too much adhesive, because you’ll probably need to remove the drawer front to install the handles and locks and apply the finish.

T-handle installation requires a relatively large hole in the drawer box and drawer front.
Step 6: Install drawer pulls and locks.
I elected to use stainless steel, locking T-handles purchased on eBay. These are convenient because they are a lock, a latch, and a flush-mounted handle, all in one. They are inconvenient because a large hole must be cut in the drawer front as well as the drawer box for installation. Sometimes, a slot must also be made in the deck to accept the latch. For this reason, I recommend holding off on applying the exterior carpet until after the lock install. If need be, you can make a mortise through the top to accept the latching mechanism and then cover it up with carpet.
Whatever you choose for a handle and lock, try to get it before construction because it may influence the order and style of your construction. If you choose a drawer pull that sticks out a ways, you may need to make your drawers shorter so that the tailgate will close.
Step 7: Sand and finish drawer fronts.
Sand up to 120 grit if you intend to paint the drawer fronts, 220 grit if you plan to use a clear finish. Make sure to smooth all the edges and ease all sharp corners. Use a high quality exterior primer/paint or varnish. Interior finishes aren’t flexible enough to withstand the wood movement that accompanies extreme temperature and humidity changes inside a vehicle.


